 聯繫支持
聯繫支持 系統狀況
系統狀況

為了測試允許您繼續使用Ooyala播放器提供視頻雲內容的播放適配器和CMS連接器,您需要在系統中添加DNS服務器,並向Brightcove提供一些信息以進行配置。本主題將引導您完成這些步驟。
簡介
至測試的播放適配器這將使您的Ooyala播放器可以從Video Cloud交付內容和/或使用CMS連接器使您可以使用Backlot API要在Video Cloud中管理媒體,必鬚髮生兩件事:
- 第一:請與您的CXM聯繫以啟動該過程。您的CXM需要從您那裡獲取IP地址,並且如果您不知道該怎麼做,它將幫助您找到它們。CXM還可以幫助您完成本文檔其餘部分中必須執行的步驟。
- 對於將要使用播放適配器或CMS連接器的每台計算機和設備,您需要做的是添加一個Brightcove DNS服務器,該服務器會將發送到ooyala.com資源的請求重定向到相應的Brightcove API。後續各節中詳細介紹了執行此操作的步驟。
MacOS步驟
假設您不在VPN上,下面是在MacOS上為Mac筆記本電腦和台式機添加Brightcove DNS服務器的步驟。
- Open System Preferences:
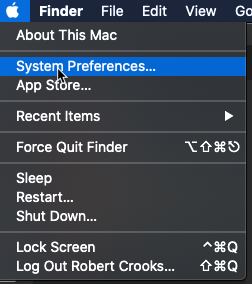
Open System Preferences - Open the Network Preferences:
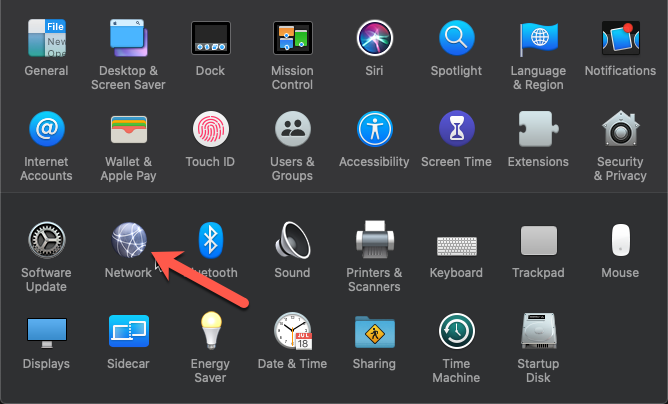
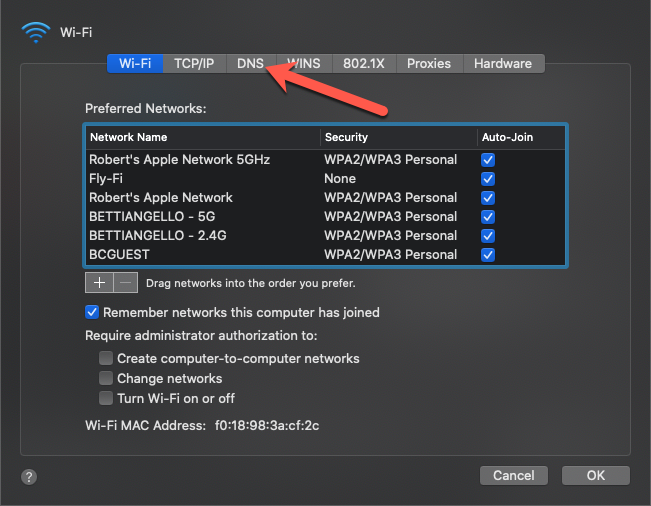
Open Network Preferences - Click On the Advanced settings:

Open Advanced Settings - Open the DNS settings:
Open DNS Settings - Click the
+sign to add a DNS server: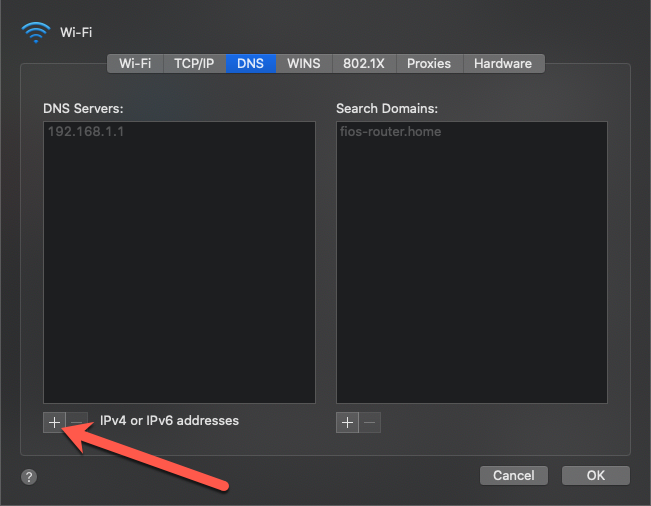
Add DNS Server - Enter the following address for the new DNS server:
35.170.73.174 - Click the
+sign under Search Domains to add a search domain: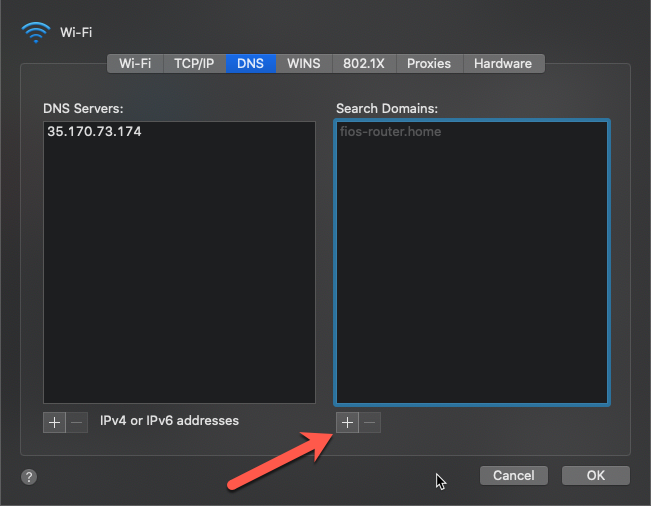
Add Search Domain - Enter the following search domain:
ooyala.com - Click OK to close the Advanced settings.
- Click Apply to save the new settings.
- Restart your Mac to clear the DNS cache.
Windows 10步驟
以下是在Windows 10筆記本電腦和台式機上添加Brightcove DNS服務器的步驟。
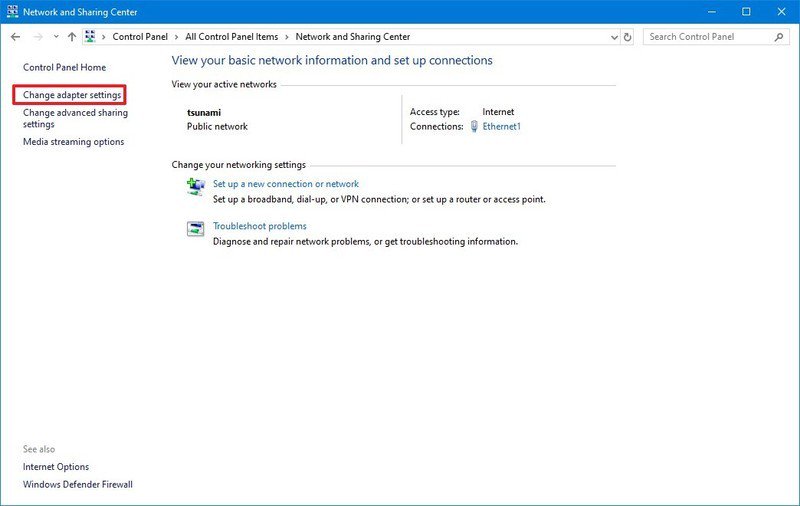
- Open Control Panel.
- Click on Network and Internet.
- Click on Network and Sharing Center.
- Click the Change adapter settings option in the left pane.
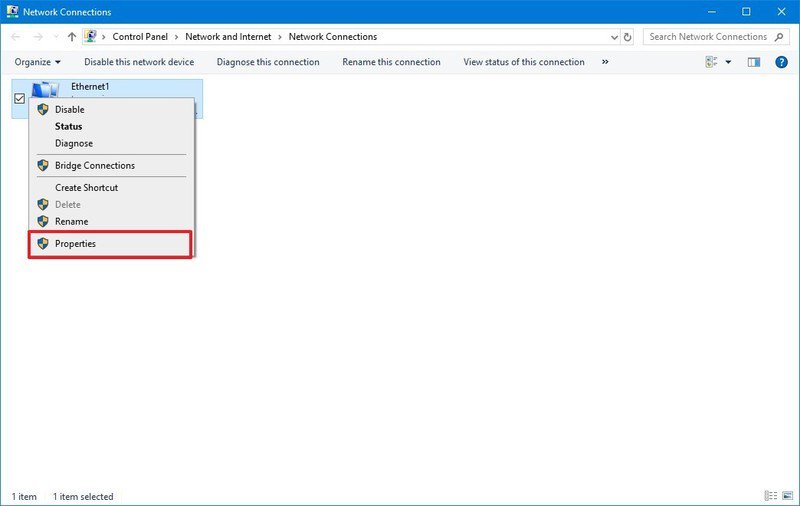
Change Adapter Settings - Right-click the network interface connected to the internet, and select the Properties option:
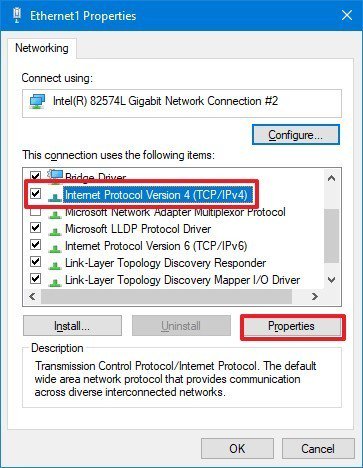
Network Interface Properties - Select and check the Internet Protocol Version 4 (TCP/IPv4) option.
- Click the Properties button.
Network Connection Properties - Click the Use the following DNS server addresses option.
- For you Preferred on Alternate DNS server address, enter
35.170.73.174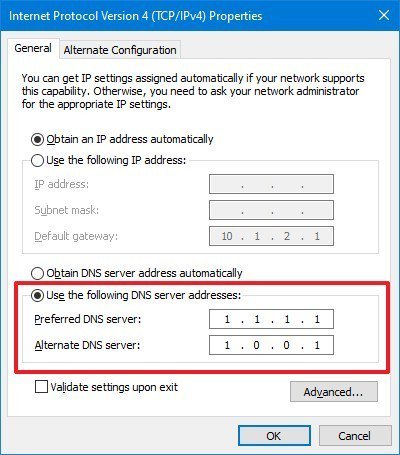
Enter DNS Server Address - Click OK.
- Click Close
- Restart the computer to clear the DNS cache.
iOS步驟
以下是在iPhone和iPad的iOS上添加Brightcove DNS服務器的步驟。
請注意,該設備必須處於Wi-Fi連接中才能進行此更改。
- Open Settings:
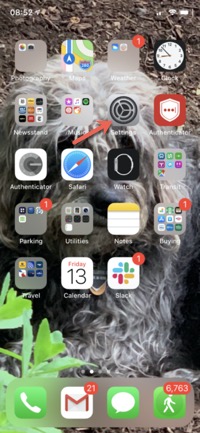
Open Settings - Open the Wi-Fi settings:
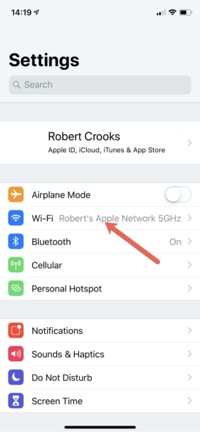
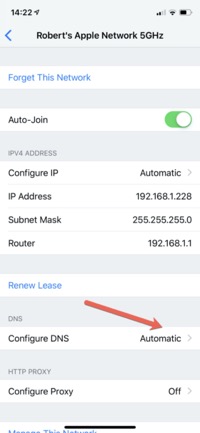
Open WiFi Settings - Open the I (information) for the current network:
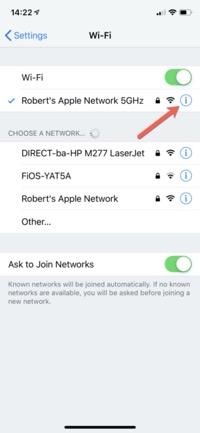
Information for Current Network - Tap Configure DNS to change the configuration:
Configure DNS - Change the DNS configuration from Automatic to Manual
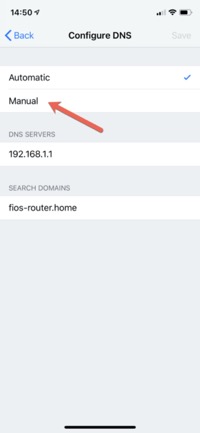
Change DNS to Manual - Add a DNS server:
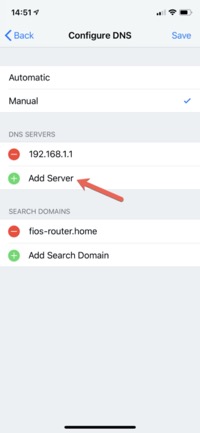
Add DNS Server - For the new server address, enter
35.170.73.174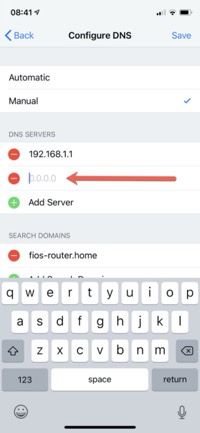
Enter Server Address - Save your settings.
- Restart the device to clear the DNS cache.
Android步驟
由於Android版本不同,以及根據對設備是否具有root用戶訪問權限以及更改DNS服務器的方式不同(如果您使用的是系統設置還是第三方應用程序),我們建議您與CXM聯繫以獲取幫助在Android上進行此更改。如果您想先自己嘗試,可以嘗試使用說明這裡。
特殊情況:虛擬專用網
如果您的計算機/設備在VPN上,則上述步驟可能不起作用,因為VPN服務器可能會使用自己的DNS服務器設置來覆蓋您的DNS服務器設置。如果發生這種情況,則需要將Brightcove DNS服務器添加到VPN。實際需要什麼命令取決於平台和VPN,但是下面顯示了MacOS示例,以幫助您理解。
在VPN接口上獲取DNS條目的subKey。例如,使用Pulse Secure,它看起來像:
sudo scutil
> get subKey [127 = State:/Network/Service/net.pulsesecure.pulse.nc.main/DNS]
> d.add ServerAddresses * 35.170.73.174
> set State:/Network/Service/net.pulsesecure.pulse.nc.main/DNS